Life Outside the City Limits
News- April 2012
- Why Bees?
- Now is the Time to Control Diplodia Tip Blight
- Getting to Know Your Yard
- Enhance Your Landscape with Summer Blooming Trees & Shrubs
- Tree Planting Depth
- Preemergence Herbicide Applications for the Home Lawn
- April is Stress Awareness Month
- Reducing Water Use Can Benefit Your Drinking Water and Wastewater Systems
- Join the Weed Watcher Team
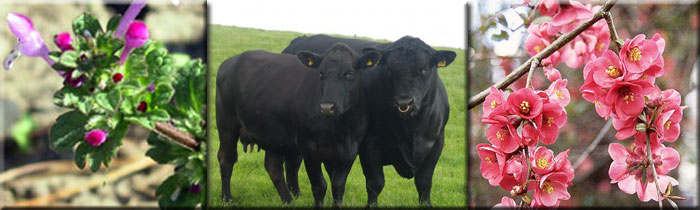
- Grass Tetany...Fast Growing Grass Can Mean Problems
- Getting Orphaned Foals Off to a Good Start
Print Entire Newsletter
Why Bees?
By Marion Ellis, UNL Entomolgy Specialist
Rewards are many for the enthusiast.
Why would anyone choose to work with thousands of stinging insects, lift heavy boxes, and get sticky? A growing number of beekeeping enthusiast are starting new colonies despite the eclectic list of problems that befall beekeeping. I searched for authoritative guidance and here's a sampling of what I found:
Postmaster, Anthony Frank, at the first-day-of issue ceremony for the honey bee U.S. postage stamp, "Now here is an insect that teaches us two of life's most important lessons; one is not to be idle, and the other is not to get stung."
William Shakespeare in King Henry V, "For so work the honey bees, creatures that by a rule in nature, teach the art of order to a peopled kingdom."
Sue Hubbell in A Book of Bees answers the why bees question nicely. "For a long, long time - for nearly forty years - I never had any bees. I can't think why. Everyone should have two or three hives of bees.... I have kept bees now for fifteen years, and my life is better for it."
Lorenzo Langstroth, whose discovery of bee space revolutionized beekeeping, wisely guided the growing industry by his counsel. The following invitation to beekeeping was given by him when he released his book, Langstroth on the Hive and the Honey Bee, in 1853. "I have determined in writing this book, to give facts, however wonderful, just as they are; confident that in due time they will be universally received; and hoping that the many wonders of the economy of the honey bee will not only excite a wider interest in its culture, but lead those who observe them to adore the wisdom of Him who gave them such admirable instincts."
Wow! After digesting what others have said about the "why would anyone want to keep bees" question, I began to list my own observations and experiences. Keeping honey bees allows one to be a part of the natural world that our increasingly urban society has hidden for many people. One cannot observe bees returning to their hives laden with pollen without wondering where it comes from, and beekeepers learn to recognize the plants that grace the countryside around them. Flowering plants have always brought joy to mankind; this effect is doubled when you are a beekeeper. Also, you cannot succeed with bees without understanding their biology and behavior. Human beings are a part of the natural world, and we share many of our genes with other living things. Can we truly know ourselves without an understanding of them? Honey bees provide a link to the natural world that will enrich your life.
Honey bees are superb teachers when trying to instill an environmental awareness and conservation ethic in young people. In learning about the importance of honey bee pollination, they realize how living things depend on other living things and that, while a few insects are pests, many are essential to our survival. Honey bees teach young people to be patient and gentle. Hastiness and carelessness have painful consequences, a lesson honey bees can teach you at a young age if you keep them. Honey bees are superb teachers.
Honey bees teach their keepers the virtue of cheerful labor. Langstroth advised, "Place yourself before a hive, and see the indefatigable energy of these industrious veterans, toiling along with their heavy burdens, side by side with their more youthful compeers, and then judge if, while qualified for useful labor, you ought ever to surrender yourself to slothful indulgence." I have many fond memories of extracting, supering, putting on winter cartons, and other bee labors with my two children (too many memories according to them). Honey bees provide ample opportunity to engage young people in meaningful work that will teach them valuable skills, give them confidence in their abilities, and allow them to earn spending money. The lessons learned from producing a product, learning how to prepare it for market, and perhaps, winning a blue ribbon at the county or state fair cannot be compared with assigning children mindless tasks such as emptying the trash to teach responsibility.
Honey bees have taken me out into wide-open spaces I would have never known without them. They have mired my truck in the mud in desolate places allowing my wife and me to share beautiful walks back to the paved road. They have introduced me to many wonderful beekeeping friends. I cannot imagine my life without bees. I have kept bees for 40 years, and, like Sue Hubbell, my life is better for it.
Videos
No fooling! April is when the drive to work in our yards hits harder. This month features information on amending your soil, beneficial insects, and using that first garden produce.
Kathleen Cue, University of Nebraska Extension, tells how to improve soil in our gardens.
Insects can be helpful in our gardens. Nicole Haxton Stoner, UNL Extension, explains how.
Nancy Urbanec, UNL Extension, has great ideas for using our early garden produce.
April Is Stress Awareness Month
By Lisa Franzen-Castle, UNL Extension Nutrition Specialist
Did you know that April is Stress Awareness Month? Most of us have felt "stressed out," but when this feeling persists, stress becomes chronic and can negatively impact our careers, quality of life, and our bodies. The first step is to pinpoint your stressors. To identify your true sources of stress, look closely at your habits, attitude, and excuses. Pinpointing your true stressors may be more difficult than you realize because some of them may be very subtle. Sometimes you may fail to notice your own stress-inducing thoughts, feelings, and behaviors.
Tips to Help Manage Stress
- Know your limits. You may be surprised by the number of stressors in your life that you can eliminate. Learning to say no is an important part of knowing your limits and sticking to them. Whether in your personal or professional life, taking on more than you can handle is a guaranteed recipe for stress.
- Alter stressful situations. If you can't avoid a stressful situation, try to alter it. Finding a way to change things can prevent a stressful situation from reoccurring in the future. Express your feelings to someone who is bothering you in an open and respectful way. And, when you ask someone to change, be willing to compromise and do the same.
- Try changing how you react. If you can't change a stressor, try changing how you react to it. Adapting to stressful situations can help regain your sense of control by altering your expectations and attitude. Try to view stressful situations from a more positive perspective. When you're down, reflect on all the things you appreciate in your life, including your own positive qualities and talents.
- Nurture yourself. Beyond a take-charge approach and a positive attitude, you can reduce stress in your life by nurturing yourself. Nurturing yourself is a necessity, not a luxury. Set aside time to relax in your daily schedule. Do something you enjoy every day, whether it is playing the piano, going for a walk, calling a good friend, or reading a book.
- Increase your resistance to stress. Did you know you can increase your resistance to stress by strengthening your physical health? Exercising regularly and eating a healthy diet can help combat stress. Make time for at least 30 minutes of activity every day. Start your day off with a healthy breakfast and keep your energy up and your mind clear with balanced, nutritious meals and snacks throughout the day.
Remember that stress is defined as mental, emotional, or physical tension or strain and too much can negatively affect your health. Some solutions to lower stress are to make a conscious effort to spend more time in a lower gear, take time in between bursts to rest and recuperate, or learn how to change your point of view and look at the positive rather than the negative aspect of a situation. Check out www.food.unl.edu for more food, nutrition, and health information.
Now is the Time to Control Diplodia Tip Blight of Pine
By Sarah Browning, UNL Extension Horticulture Educator
Browning and death of branch tips is quite common in older, well-established pine plantings. Such damage is often due to Diplodia Tip Blight, (syn. Sphaeropsis tip blight). Infection kills current-year shoots and eventually may kill whole branches. This causal fungus becomes increasingly more common and destructive as trees age, although young trees can be affected. Austrian pine is the most severely affected of the pines, but Ponderosa pine, Scotch pine and Mugo pine are also susceptible.
Symptoms
The most conspicuous symptoms of Diplodia tip blight are stunted new shoots with short, brown needles still partially encased in their sheath. Infected shoots are quickly killed and may be located throughout the entire tree, although damage is generally first evident in the lower branches. The severity of damage may vary considerably throughout the tree, with some branches that have been infected several years in a row dying back completely. After two or three successive years of infection, treetops may also be extensively damaged. Repeated infections reduce growth, deform trees and ultimately kill them.
Small, black, pimple-like structures develop at the base of infected needles and on the backside of pine cone scales. These structures produce additional fungal spores that can re-infect the tree.
Pests Causing Similar Symptoms
Diplodia tip blight can be confused with damage from pine tip moths; however, pine tip moth damage can be distinguished by the presence of larvae or tunnels found when the affected shoot is slit open. It should also not be confused with pine wilt, a diseased caused by trunk-dwelling nematodes, which is killing many pines across Nebraska. Pine wilt primarily affects Scotch pine trees, and kills the entire tree very quickly. Usually within a matter of 2 or 3 months.
Control
New shoots are most susceptible during a two-week period starting when the buds begin to open and continue to be susceptible through mid-June. Infections are worse during years with very wet spring conditions, which promotes disease infection. High humidity also promotes the germination of spores. Fungus spores are dispersed primarily on rain splash from March to October.
Two applications of fungicide are normally recommended for application during the third week in April and a second application in the first week of May for eastern Nebraska. However, with this spring's unusually warm conditions has resulted in earlier tree growth than normal. So this year, applications should be made now or as soon as buds at the tips of the branches begin to open, with a second application 7-10 days later. Bordeaux mixture, liquid copper (Tenn-Cop 5E) or fixed copper (Basic copper sulfate, Tribasic copper sulfate) are effective in treating this disease. Read and follow all label directions carefully before application.
More information:
Diseases of Evergreen Trees, Nebraska Forest Service
Sphaeropsis Tip Blight of Pine, University of Nebraska- Lincoln Extension
Getting to Know Your Yard
By John Fech, UNL Extension Horticulture Educator
It's a common assumption that grass can be grown just about anywhere. Well, it can--but not well. In fact, grass plants are as dependent on location as flowers and vegetables. Although it's easy to assume that your lawn is growing in the most logical places, chances are a few areas would be better off without grass, while at least one bed of ornamentals or shrubbery would look and function better as lawn. So, try to think of the yard as a blank slate, even if you've lived in the same place for twenty years.
To get started, step outside and look at your yard as if you've never seen it before. Simply walk around with an open mind and your favorite drink in your hand, making mental notes about what would look good in each part of the landscape. For now, resist the temptation to think of specific plants. Instead, visualize general shapes and forms of plant material. Picture the various activities that you and your family like to engage in--touch football, backyard barbeques, sunbathing. This will get you ready for preparing an inventory and analysis.
You may wish to ask a friend or neighbor with a healthy lawn to join you for a stroll around your property and make suggestions. Have a clipboard in hand to record any ideas that strike you as helpful. For a fresh perspective on the home landscape, you might also ask if you can view your yard from a neighbor's top story or deck. The point of this odd sounding request is that it is much easier to understand the lawn's layout from above ground level.
A casual tour of your property is a start, but I suggest that you arm yourself with a clipboard and go through a four-step process that will guide you to making smart decisions.
Step 1. Do an inventory. Begin by drawing a simple map of the site. With a blank piece of graph paper in your clipboard, rough-in the driveway, the house, the patio, and other structures that are not likely to change in the next 5 years. (If you have access to the property's plat or survey, you can use a copy for the base map). Next, note the site's qualities on the map. Here are some specific areas to focus on:
- Vegetable gardens. Record whether plants are healthy and producing well, or showing signs of disease.
- Groupings of ornamentals. Look for blotches on the leaves, a possible sign of foliar disease. Note plants that produce some leaves, but don't flower or look thrifty, which is often caused by the presence of pathogenic diseases or putting the plant in the wrong place.
- Soils. Identify areas where there tends to be standing water; cracks or ruts in the ground tend to indicate chronically wet spots.
- Lawn. Look for off-colored grass and thin, worn-out areas, as well as healthy and thriving sections of lawn.
- Trees. Note where trees with a dense, thick canopy produce heavy shade. Look for areas where falling leaves may smother the lawn.
Step 2. Do an analysis. Write down your judgements about these landscape elements on the plan, using a different color of pen or pencil to help the analysis stand out from the inventory.
For example, if the inventory noted that there are 3 to 4 hours of shade at one side of the house, the analysis might add that it is filtered shade and not heavy shade, and that it falls only in the morning.
Together these two sets of details will suggest the level of adaptability that a grass species must have to thrive there and influence your eventual plant and grass selection. You may be a fan of creeping red fescue, but it won't survive long in hot afternoon sun, and the inventory-and-analysis process will keep you from making expensive and time-consuming mistake of using this species for a full sun location.
- Vegetable gardens. If the veggies look great and the garden receives 8 hours of sun each day, then leave it as it is now. However, if the area gets only 3 hours of sun and the plants are pale, covered with mildew, and producing only a few fruits, then it's a good idea to rip out the vegetable plants and plant the garden to a shade-adapted groundcover or species of grass.
- Groupings of ornamentals. If there are blotches on the leaves, the shrubs may simply need a good pruning to increase air flow through them. Check to see if the soil is soggy, or if the stems are infested with scale insects. The number of hours of sun is a critical point for certain plants; viburnums won't flower and burning bush (euonymous) won't turn red in fall if they are not located in full sun.
- Soils. Standing water will cause most plants to struggle due to low oxygen levels. Consider changing larger areas to a pond or planting a mini-wetland with reeds, rushes, and cattails. Cracks and ruts from the lawn mower wheels usually indicate the soil is too hard to support good root growth, or that the yard is compacted from excessive foot traffic.
- Lawn areas. Off-colored, thin, or worn-out areas may indicate a poor choice of grass species. *Trees. If trees cast a heavy shade on the lawn for several hours each day, then you should select from shade-adapted grasses, such as tall fescue, fine fescue or mixtures of fescue and shade adapted cultivars of Kentucky bluegrass.
Step 3. Locate the areas for lawns and gardens. After the inventory and analysis notes are down on paper, lay a sheet of translucent paper on top for this next step. Now it's time to decide how each area of the yard would be used best. For example, areas that are in full sun, mostly flat, and well drained tend to be good places to grow a lawn. Using a pencil, outline these areas to make simple lawn shapes. Try to avoid creating long, narrow, linear, or strictly geometric shapes for lawns, unless you desire a very formal yard; these shapes are harder to water, fertilize, and mow. Feel free to erase and start over if your first shapes don't seem pleasing. Even the most accomplished landscape designers will draw several shapes in arriving at a good outline. Pick a color with which to shade in parts of the landscape that are well suited for a lawn.
If the inventory and analysis suggest that grass is not the best choice for an area, consider alternatives such as groundcovers, perennial flowers, and shrubs. As you divide up the yard, keep in mind that beds of groundcovers and ornamentals typically require less work once established than lawns. Indicate each of these non-lawn areas with its own color. Finally, you may want to move existing features. For example, if the vegetable garden isn't in full sun, designate a new area for it in a part of the landscape that is free of shade most of the day.
Step 4. Choose a grass species. Finally, you're ready to select the plants, including one or more types of lawn grass. Each species of grass has an ideal set of conditions that, if met in your yard, will allow it to thrive. After you have identified lawn areas, use the notes from the inventory and analysis to select from the grasses in terms of sun, shade, traffic, disease or insect problems, soil conditions, and slope of the land.
Enhance Your Landscape with Summer Blooming Trees & Shrubs
By John Fech, UNL Extension Horticulture Educator
To develop a landscape with all season appeal, include plants with ornamental bark, showy fall color and summer as well as spring flowering habits. Most commonly used trees and shrubs flower in spring, so when one is noticed in summer, it stands out and really brings favor to the site. As with all landscape plant material, check the hardiness before planting in your landscape.
Summer Flowering Trees
- Black locust, Robinia psuedoacacia -- fragrant, white flowers in pendulous clusters
- Tulip tree, Liriodendron tulipifera -- greenish orange tulip shaped flowers
- Japanese tree lilac, Syringa reticulata and Pekin lilac, Syringa pekinensis -- large clusters of creamy white privet scented flowers
- Smoketree, Cotinus coggygria -- flower stalks covered with fine hairs, producing a smoky pink appearance.
- Linden, Tilia spp. -- small yellow or white flowers which produce a heady fragrance
- Kentucky Coffeetree, Gymnocladus dioicus -- off white, fragrant flowers in cascading panicles
- Kousa Dogwood, Cornus kousa -- leaflike creamy white bracts
- Yellowwood, Cladrastis kentukea -- white flowers in pendulous panicles
- Goldenrain tree, Koelreuteria paniculata -- wide clusters of wide yellow flowers
- Amur Maackia, Maackia amurensis -- masses of dull white flowers
- Japanese Scholar Tree, Sophora japonica -- creamy white flowers in loose panicles
Summer Flowering Shrubs
- Bush Cinquefoil, Potentilla fruiticosa -- small yellow or white flowers
- Coralberry, Symphoricarpos chenaultii -- pink flowers on terminal growth
- Annabelle hydrangea, Hydrangea arborescens -- dull white baseball sized flowers
- Ninebark, Physiocarpus opulifolius -- white to pink flowers
- Rose of Sharon, Hibiscus syriacus -- two to three inch white, red or violet flowers
- Snowberry, Symphoricarpos albus -- pinkish flowers
- Mockorange, Philadelphus spp. -- fragrant, one inch white flowers
- Bumaldi Spirea, Spirea bumalda -- reddish yarrow like flowers
- Tamarix, Tamarix ramosissima -- fine rosy pink flowers
- Arrowwood Viburnum, Viburnum dentatum -- three inch white flowers
Tree Planting Depth
By Kelly Feehan, UNL Extension Horticulture Educator
Arbor Day is in April, making this a good time to write about not planting trees too deep. This is a practice that is becoming an epidemic and killing or stressing many trees.
Researchers at the Bartlett Tree Research Laboratories in North Carolina excavated 363 newly planted trees and found 93 percent had either excessive soil or excessive mulch covering the root collar (the area where roots meet the trunk and the trunk flares slightly at the base).
Trees planted too deep may not survive for more than two years. Those that do survive often remain in a weakened condition for a number of years. Eventually, some stress like drought, disease or insects are more likely to kill them.
If a tree trunk enters the ground as straight as a telephone pole, with no flare visible, the tree has been planted too deep. Deep planting kills or stresses trees because the roots do not receive the level of oxygen needed for healthy root growth.
As little as one to two inches of soil placed over the roots of established trees can cause trees to decline and die. During tree planting, it is not unusual for trees to end up being planted as much as six to nine inches deeper than they should be.
To avoid planting trees too deep, do not follow the old recommendation of planting trees at the same depth they were at the nursery or in the container. Instead, locate the root collar of the tree before digging the planting hole. Some soil may need to be pulled away from the trunk to locate the root collar.
Again, the root collar is the area where the roots meet the trunk. This area is also referred to as the trunk flare since the trunk flares slightly at this point. After the tree is planted, the trunk flare needs to be visible above the soil line with the first lateral roots just below ground.
After locating the root collar, dig the planting hole only as deep as needed so the trunk flare remains just above the soil line after planting. If the hole is dug deeper, settling will occur after planting and the tree may end up too deep. When planted, set the root ball on undisturbed soil.
Do dig the planting hole two to three times wider than the root ball. Tree roots grow outward with the majority of roots growing in the upper 18 inches of soil. Digging a wide planting hole loosens the surrounding soil to encourage root growth.
When planting, remove all containers, even peat pots. After balled and burlapped trees are planted, remove the twine around the trunk, cut away as much of the burlap as possible, and snip off all or as much of the wire basket as possible.
When backfilling the hole, backfill with soil that was removed from the planting hole. Do not add soil amendments to the planting hole as this may encourage roots to grow in the planting hole and not outward into surrounding soil.
As the hole is backfilled with soil, water every few inches to settle the soil. Do not tamp the soil with your foot as this can create compaction. Once the hole is filled with soil, place a two to four inch layer of organic mulch in a four foot diameter ring around the tree.
Avoid using a deeper mulch layer or piling the mulch against the trunk. Just as planting too deep can decrease oxygen levels for roots, using too deep of a mulch layer will also decrease soil oxygen levels. Deep mulch is another epidemic killing or stressing young trees.
Along with not planting too deep or using too much mulch, other general rules of thumb at planting time are do not prune living branches (it's okay to remove dead or broken branches); do not fertilize, especially with nitrogen; and do not wrap the trunks of trees during the growing season.
For larger trees planted on windy sites, stake the tree low on the trunk and use staking materials that will not damage or girdle the trunk. The purpose of staking is not to prevent the top half of the tree from gently swaying with the wind, but to prevent the root ball from shifting and damaging new roots. Trees should only be staked for one year after planting.
Preemergence Herbicide Applications for the Home Lawn
By Sarah Browning, UNL Extension Horticulture Educator
This spring's extremely warm weather has plants blooming almost a month ahead of schedule and gardeners scratching their heads. So many of the normal spring garden tasks are associated with dates on the calendar, and this year's unusual conditions are throwing everything into question. One of the biggest questions in gardeners minds today, is when they should make the first preemergence herbicide application on lawns and landscape beds?
It is confusing, since University of Nebraska- Lincoln Extension turfgrass specialists for years have recommended April 20th to May 5th as the target dates for the first application. That recommendation is based on the germination time of crabgrass, which occurs when soil temperatures reach 55 degrees F several days in a row. A few hours or even a single day of warmth is not enough to induce germination, several days of 55 F degrees soil temperature is required. Typically in eastern Nebraska soil temperatures have reached the "55 degrees for several days" mark in the last week of April or first week of May.
However, all that is out the window this year. Based on data from the High Plains Climate Center, average soil temperatures at four inches are 8 to 22 degrees F higher than normal across Nebraska, making conditions very favorable for crabgrass to begin growing. So UNL turfgrass specialists recommend that the first preemergence herbicide application be done now in eastern Nebraska, and within the next week for western Nebraska. Furthermore, they recommend that a second application should be planned on almost all lawns in the first week of June. Single applications will produce adequate control on most lawns in "typical" years
Several pre-emergent herbicide chemicals can be found in products available to homeowners. To figure out which one you are buying, look for the chemical name in the active ingredient statement on the front of the fertilizer bag.
- trifluralin and benefin (Team)
- dithiopyr (Dimension)
- pendimethalin (Pendelum, Pre-M)
- prodiamine (Barricade)
If you are concerned that some crabgrass has already germinated before your herbicide application was made, then consider using dithiopyr. When applied at the full label rate, dithiopyr will kill crabgrass seedlings if applied before they reach the tillering stage.
Also, keep in mind that mowing height can play a significant role in your lawn's weed problems. Research at the UNL Turfgrass Research Facility has shown that raising the mowing height from 1.5 inches to 2.5 inches in a Kentucky bluegrass stand decreased crabgrass infestation from 80% to less than 15% respectively. This is one of the primary reasons why a mowing height of 3.0 inches season-long is recommended on all lawns in Nebraska .
For more information on managing your lawn, visit UNL Turf iNfo at http://turf.unl.edu. Check out "It's Time to Mow" for tips on how to keep you lawn looking its best this summer.
Find out your soil temperature at the Backyard Farmer website, http://byf.unl.edu. Click on "Nebraska's local Soil Temperatures."
Grass Tetany... Fast Growing Grass Can Mean Problems
By Steve Tonn, UNL Extension Agriculture Educator
Mature cattle grazing pasture with rapidly growing grass are sometimes found to be afflicted with a disease called grass tetany. It is characterized by an uncoordinated gait (grass staggers), convulsions, coma, and death. The primary cause is limited dietary intake of magnesium (Mg) leading to hypomagnesemia (low blood Mg) in the cow. Cows nearing calving and up to two months post-calving are most susceptible as they must draw on feed and body reserves to supply minerals for milk production. Tetany is rarely observed in younger cattle. In sheep it is not a common problem, but may occur in ewes in the first few weeks after lambing.
Tetany-prone pastures are typified by rapidly growing grass with a slow plant uptake of Mg from the soils. This leads to succulent forage with a low Mg content (less than 0.12%). Most tetany episodes occur in the months approaching spring and on into the growing season. Heavy nitrogen fertilization, high soil potassium levels, and cool, rainy weather accentuate the problem. If you can delay the use of tetany-prone pastures by mother cows until forage growth is less lush or include dry forages with safe levels of Mg (0.2 to 0.25%) along with pasture, it will help decrease the incidence of grass tetany. Graze less susceptible animals (steers, heifers, dry cows, cows with calves over four months old) on these tetany-prone pastures. Cattle that develop grass tetany are prone to repeat occurrences so cull these animals out of your herd. Planting legumes along with grasses can help increase Mg content of the pasture diet.
Although grass tetany is a problem in mineral metabolism, preventing it is not always possible just by providing a trace mineral supplement (with or without salt). Of course, making trace minerals available to livestock is certainly recommended in order to satisfy the daily requirement for essential minerals under normal circumstances. The problem in trying to prevent grass tetany with a mineral mix is inconsistent consumption of supplements, especially on large pastures. Try using a trace mineral mix with high Mg available through your veterinarian or visit your local feed supply store for other alternatives. Be sure to evaluate cost and effectiveness of any supplement you choose for the specifically intended use. Loose mineral mixes, compared to solid blocks, are more uniformly consumed and the amount eaten can be monitored on a weekly basis. Feed minerals out of a strategically placed weather resistant container. Alter the location of the mineral mix to help distribute your cattle more evenly around the pasture. This will help with manure distribution (natural fertilizer) and give more uniform grazing of the forage (promotes healthy pastures).
Magnesium oxide (MgO) is a common form of Mg however it is not very palatable. Try mixing MgO with dry molasses to make it more attractive to your cattle. Fortifying the drinking water with Mg is an alternative to mineral mixes. MgO is insoluble in water, so make sure you use the proper amount of a soluble form so that toxic amounts are not consumed. Supplement levels up to 0.25 lb/day are not toxic to cattle. However, Mg at 0.4 to 0.8 lb/day has resulted in deleterious effects. The National Research Council has established maximum tolerable levels of Mg for beef cattle at 0.4% of the ration.
Typically, harvested forages (especially grasses) are not rich in Mg. Forages with less than 0.12% Mg are considered tetany-prone, while those with 0.12 to 0.18% Mg are marginal and 0.2 to 0.25% Mg are safe. The range of Mg in the hay surveyed was 0.06 to 0.36% on a dry matter basis, with no pure alfalfa hay in the Forage Library qualifying as tetany-prone hay. Besides Mg, minerals such as potassium (K) and calcium (Ca) can contribute to grass tetany. A so-called tetany ratio, (K)/(Ca + Mg) can be calculated for forages. If this ratio is greater than 2.2, the forage can be classified as tetany-prone. The tetany ratio is calculated on an equivalent weight basis (that is, does not use the percentage or ppm as shown in the feed analysis report, but rather uses the amount of each element corrected for molecular weight.)
Thus, the formula is: (K concentration/39) / (Ca concentration/20) + (Mg concentration/12.1)
Treatment of grass tetany is difficult because of the rapidness with which the disease progresses (within hours). Be prepared to respond on your own, help may be too late in arriving. Commercial preparations of Mg solutions for injection under the skin are available. Intravenous injection is also an option, however, rapid delivery can be harmful to cardiac function. Administration of Mg enemas is another possible emergency treatment. Keeping stress to a minimum is critical with grass tetany. Treat effected cattle, increase the supplemental Mg of the remaining animals' diet (2 oz of MgO per head per day), quietly remove the herd to more mature pastures or legume mixed pastures, or to a location where they can be fed hay and supplemental Mg. Be prepared for this disease by taking preventative measures and by keeping supplies on hand in case you need to treat animals. The best cure is prevention. Keep daily Mg supplied to the cattle when tetany problems are anticipated. Contact your veterinarian to discuss a herd health program and for help with specific incidences of grass tetany.
Source: Shelby Filley, Oregon State University Regional Livestock & Forage Specialist
Reducing Water Use Can Benefit Your Drinking Water and Wastewater Systems
By Sharon Skipton, UNL Extension Water Quality Educator
Using less water reduces wear and tear on your water distribution system, and reduces energy use. In addition, it reduces the amount of wastewater that needs to be treated, which can help extend the life of your septic system. The toilet, shower, and clothes washer account for two-thirds of the water used in an average household. To use less water, start with appliances and fixtures that use the greatest amounts of water.
Spread out your water use if you use a septic system for wastewater treatment. Hydraulic overloading, where too much water enters the system in a short period of time, is the number one cause of septic system failure. Avoid hydraulic overloading by washing only one or two loads of laundry a day.
About 20% of all toilets leak. You can lose 200 or more gallons of water a day from a leaky toilet. To check your toilet, put a few drops of food dye in the toilet tank. If, after 15 minutes, color appears in the bowl, you have a leak that should be repaired. Typically, the toilet flapper needs replacement.
A toilet installed prior to 1993 may use up to 8 gallons of water per flush. New toilets use 1.6 gallons per flush. Dual flush toilets use 0.8 gallons (for urine) and 1.6 gallons (for solids) per flush. Toilet dams, 1.6 gallon flappers, or water-filled plastic containers can be installed in older toilet tanks, but reduced flow can affect flushing. About 3 gallons of water may be needed in the tank to flush properly. Avoid using bricks that can crumble and affect operation.
Adjust clothes washer water levels to the laundry load size and soil level. Some washers sense the load size and soil of water and fabric and adjust the water level accordingly. Water-efficient clothes washers use about 1/3 as much water as traditional washers. Look at labels and compare the amount of water used for the same tub capacity.
Older shower heads can use 6 to 8 gallons of water per minute when fully opened. As of 1994, shower heads use no more than 2.5 gallons per minute. A new trend toward shower "systems," with multiple heads and nozzles, is not water efficient. They often use 6, 8, or even 10 gallons per minute.
By replacing fixtures and appliances as they wear out with water-efficient units, and being conscious of your water use, you will be conserving water and lengthening the lifespan of your septic system.
Join the "Weed Watcher Team"
By Brent Meyer, Lancaster County Weed Superintendent
Our "NEW" Weed Watcher Program in Lancaster County is designed to train and support volunteers to find and report new occurrences of harmful invasive plants. Weed Watchers help protect natural areas from the impacts of invasive plants by detecting new populations early before they get out of hand.
Preventing a plant from invading in the first place is more efficient, less ecologically damaging, and less strenuous than managing large plant infestations after they are already established.
A second and equally important goal of the Weed Watcher program is to build capacity for other organizations to initiate early detection programs by serving as a potential model and providing educational materials for use and adaptation. Invasive plant early detection programs can be as simple as informally training your staff or volunteers on weeds to watch for, or recruiting and training new volunteers to survey high priority weed-free sites. It can be very challenging and rewarding to be the first to find new infestations of invasive plants that were previously not reported.
Education
Outreach and education are a key component in organizing a successful program. Our staff will be available to train anyone wishing to join the Weed Watcher Program. The program includes a Weed Watcher Resource Guide, a photo calendar to help you identify invasive plants as they grow throughout the season, and a hit report to give you a way to report the infestation.
Who are the Weed Watchers?
Weed Watchers are people who care about the health of our lands and want to help prevent the ecological and economic damage associated with plant invasions by looking for and reporting new weeds. Weed Watchers can be private citizens who simply want to scan for new invaders while they hike. Often Weed Watchers are people already actively volunteering as a Master Gardener or for their local UNL Extension. Public and private land owners such as the Nebraska Game & Parks, Natural Resource Districts, or Farm Service Agencies also have staff and volunteers who watch for weeds as they trek across their land. Outdoorsmen, hunters and fishermen, geocachers, 4-H groups, boy scouts and girl scouts, are just a few of the groups than can help make a difference.
What does a Weed Watcher do?
"Weed Watchers Trek to Protect"
Weed Watching is as easy as one, two, three:
- Learn the weeds.
- Look for weeds.
- Document and report weeds.
Interested?
We need everyone's help, so if you would like to become part of the Weed Watcher program or you belong to a group that is interested in joining the program contact the Lancaster County Weed Control Office. Email: weeds@lancaster.ne.gov or phone 402-441-7817.
Getting Orphaned Foals off to a Good Start
By Kathy Anderson, UNL Extension Horse Specialist
Orphaned foals can be a great challenge to get off to a good start, but careful planning, much dedication and hard work can help them end up normal healthy adult horses. Orphans are a challenge at any time, but even more so if they are orphaned right at birth. Losing a mare is never expected and being left with a motherless orphan can turn into an unexpected nightmare. Although very exhaustive at first, intensive management early on will optimize the foal's survival chances.
If a foal is orphaned at birth, the first 24 hours is very critical. Normally foals receive sufficient antibodies through the mother's milk shortly after birth through nursing colosturm. A mare's first milk or colostrum contains a high concentration of immunoglobins (antibodies) to protect the foal from disease and infection. Colostrum is secreted by the mare in her milk only during the first 24 to 48 hours following foaling. There is no transfer of antibodies from mare to developing foal through the placenta during pregnancy, thus foals are born without any protection from disease.
The ingestion of colostrum by the newborn allows for passive transfer of immunoglobulins, which provide almost immediate immunity to the foal. Foals which do not receive these antibodies are at high risk and are diagnosed as having a condition known as failure of passive transfer (FPT). Foals absorb the maximum amount of colostrum through the gastrointestinal tract in the first 6 hours after birth, and basically no absorption occurs after 12 to 18 hours, and thus must be supplemented with plasma transfer or other sources. Ideally a foal should receive 250-300 ml of colostrum every 1-2 hour for the first six hours after birth with at least a total of 1 liter. If the foal cannot nurse directly from the mare, it is a good idea to have a veterinarian administer it directly with a nasal-gastric tube to ensure nothing is wasted and the foal gets the needed amount.
The immunity level of the foal should be tested by a immunoglobulin G (IgG) blood test to determine if the antibody levels are sufficient. This test can be run as early as 8 - 12 hours after birth, which would allow for a second feeding of clostrum if the levels are low. The preferred IgG level is 400 - 800 mg/dl.
Many broodmare owners having very many foals will collect and store colostrum in case of emergencies. Colostrum can be collected from good milking mares once their newborn foals have nursed. It has been shown; 200 to 500 ml can be milked from mares without affecting the antibody passage to her own newborn foal. However, remember, this needs to be done within the first 24 hours after she has foaled. The collected colostrums can be frozen for up to 3 years if stored properly. When it is needed, this frozen colostrum should be thawed at room temperature in a warm water bath just before use. Do not thaw by microwave as essential antibodies can be destroyed.
Once you have established sufficient immune protection, now you need to work on the daily care and feeding of the orphan. Normally, foals nurse up to seventeen times an hour during the first week of life! But this will decrease to three times per hour in the first few weeks of life. There are a few basic options an owner has: use a nurse mare or goat, or manually feed the orphaned foal.
Obtaining a nurse mare would generally be highly desirable as it would greatly reduce labor. Unfortunately, nurse mares can be hard to find. Another potential problem includes convincing the nurse mare to accept the foal. One substitute is to use goat's milk by purchasing a milk-producing goat. Some orphan foals have been fostered onto nanny goats with minimal problems. These goats can be placed on hay bales or platforms so the foal can nurse. However, as the foal grows, the goat may not be able to provide enough milk so supplemental feed may be needed.
Most commonly, however, owners derive some type of manual feeding program. Initially, foals can be bottle fed with preferably a powdered mare's milk replacer. When bottle feeding, a lamb's nipple on some type of bottle works best and do small, frequent feedings. Very weak foals may need to be fed initially through a nasal gastric tube (stomach tube) by a veterinarian. Many owners prefer to train even young foals to drink out of buckets. It has been recommended to offer the very young foals 400 ml of milk replacer every hour. Once the foals are a bit older (2 + weeks), the schedule can change to every 4 hours, but a consistent feeding schedule is very important. Even very early on, foals should be offered both milk replacer and pellets formulated for young orphaned foals. Many tend to prefer the pellets very quickly, and then slowly transition onto creep feed over a few months. Additionally, some high quality hay can also be fed after the first few weeks.
It is essential to monitor the foal's overall health. If the mare was ill before parturition, the newborn may be malnourished. The foal should be able to stand, walk, have a suckling reflex, and nurse a bottle within two to three hours. Often times, small, weak foals may appear fine initially, but begin to deteriorate with in 24 hours. If this happens, veterinarian assistance may be critical. Foal neonatal centers are available but can be extremely expensive.
As with any newborn, a dry, clean, warm environment is essential. As the foal becomes stronger, it should be turned out into a small pasture or lot for exercise. If possible, rear the orphan with another orphan, pony, goat, or horse. Orphan foal behavior problems can be reduced if owners make every attempt to treat the foal as a horse and not as a pet.
The health care program of orphan foals must be monitored closely. All routine vaccinations and deworming must be timely for the orphan to get the greatest benefit. Foals should receive their initial vaccinations for tetanus, encephalomyelitis, influenza, and rhinopneumonitis at 60 days of age, with an additional booster four to six weeks later. Parasite control can be initiated at 60 days of age, and should be done at a minimum every eight weeks. A continuous daily dewormer is available and could bene-fit many orphans by minimizing parasite infestation.